Elevate Landscapes with 2025 Self-Watering Walls
Living walls have evolved from niche design elements into essential features for residential patios, home interiors, and commercial environments. The latest self-watering walls simplify vertical gardening through reliable automation. These setups integrate irrigation directly into modular panels, enabling greenery on diverse surfaces with reduced daily intervention. For individuals seeking to infuse vitality into walls, these systems eliminate the need for constant watering and intricate maintenance routines.
Understanding Self-Watering Walls
A self-watering wall functions as a vertical garden equipped with an embedded irrigation mechanism. Panels or modules accommodate plants and substrate, while hidden tubes or wicks ensure uniform water distribution. This design maintains optimal moisture levels and avoids excess saturation. Advanced models incorporate sensors that detect soil humidity and regulate water flow precisely, whereas basic versions utilize reservoirs that dispense water gradually via capillary action.
Core components typically encompass:
- Mounting frame: Anchors modules to walls or independent structures for stability.
- Planting panels: Compact pockets or containers that retain soil and support root systems.
- Irrigation network: Includes tubing, drip emitters, or wicking materials for targeted hydration.
- Water reservoir: A storage tank or channel that sustains hydration for days or weeks.
- Drainage mechanism: Collects surplus water to safeguard underlying surfaces from harm.
These elements collaborate to sustain a balanced, self-regulating plant environment with limited user input.
Reasons Homeowners Adopt Self-Watering Systems
Conventional living walls demand regular watering, vigilant oversight, and expert setup, which deter many users. Self-watering alternatives address these hurdles effectively. They provide the aesthetic and functional rewards of vertical greenery to time-constrained individuals or novices without requiring ongoing labor.
Notable benefits comprise:
- Minimal upkeep: Reservoirs require replenishment only every two to four weeks, depending on conditions.
- Efficient water use: Automated delivery optimizes absorption and minimizes evaporation or runoff.
- Robust plant growth: Consistent hydration promotes uniform development and resilience.
- Surface protection: Integrated drainage averts moisture damage, leaks, or discoloration.
- Adaptable placement: Modules suit compact balconies, boundary fences, or interior feature walls.
Such systems render ambitious vertical gardens achievable for everyday users.
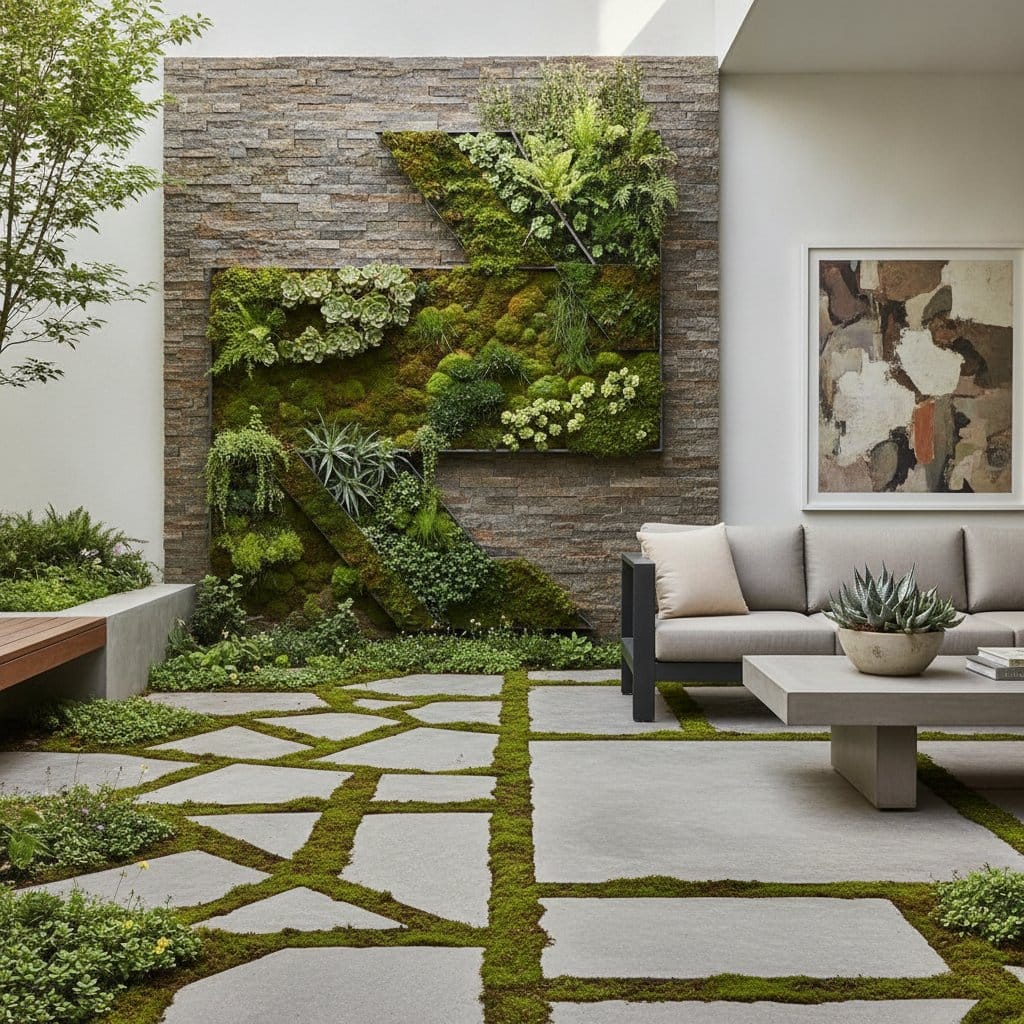
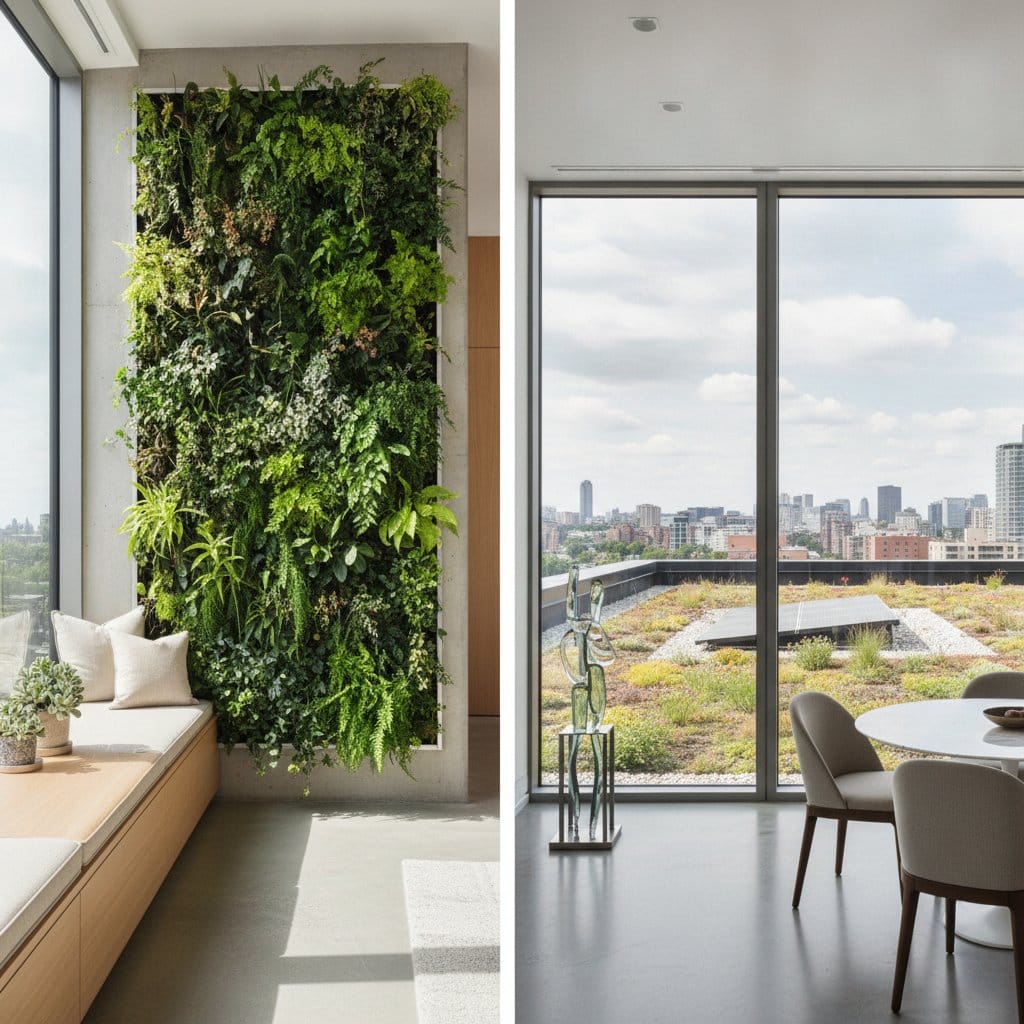
Exploring Design and Material Choices
Contemporary self-watering walls offer diverse configurations to match varied preferences. Options range from petite kits for confined areas to expansive modular arrays for building exteriors. Construction materials prioritize durability, such as UV-resistant recycled plastics, corrosion-proof aluminum, or robust stainless steel, ensuring longevity in outdoor settings.
Popular configurations include:
- Freestanding partitions: Perfect for patios or zoning open areas without wall attachment.
- Wall-affixed panels: Secure to masonry, wood siding, or metal fences for seamless integration.
- Interior configurations: Enclosed frames shield indoor walls from humidity while adding visual interest.
- Expandable grids: Facilitate gradual scaling or reconfiguration as needs change.
Plant selections vary by exposure and region; consider low-light tolerant pothos or philodendrons for indoors, or drought-resistant lavender and sedum for exteriors. Homeowners often blend foliage types for depth, incorporating trailing ivies with upright grasses to achieve dynamic textures.
Essential Installation Steps
Self-watering wall setup demands thoughtful preparation but proves manageable for most. Begin by assessing site conditions to confirm adequate illumination and load-bearing capacity, as saturated modules can weigh substantially.
Follow these sequential actions:
- Select a site with appropriate sunlight and a sturdy base, verifying it supports up to 20 pounds per square foot when loaded.
- Affix mounting brackets using corrosion-resistant hardware, spacing them evenly per kit guidelines.
- Link the irrigation to a nearby faucet or prime the reservoir with treated water to prevent algae.
- Populate panels with a well-draining, peat-free soil blend optimized for vertical growth.
- Position plants, ensuring roots establish firmly without air pockets.
- Activate and monitor the system for 24 hours, adjusting emitters for balanced coverage and verifying drainage flow.
Compact installations complete in under four hours, while elaborate outdoor projects span a full day. DIY approaches suffice for simpler units, but consult professionals for structural reinforcements or complex plumbing integrations.
Evaluating Costs
Expenses fluctuate with scale, craftsmanship, and technological features. Entry-level indoor kits with basic reservoirs start around $200, accommodating 10 to 20 plants. Mid-range outdoor assemblies with timers reach $800 to $1,500, covering larger surfaces.
Premium automated variants, including app-enabled controls and recirculation pumps, exceed $3,000 for comprehensive installations. Beyond upfront investment, factor in long-term savings from curtailed water bills and fewer plant losses. Prioritize systems with modular replacements and weatherproof components to extend service life and curb repair expenses.
Ongoing Maintenance and Seasonal Adjustments
Self-watering designs minimize routine tasks, yet periodic inspections preserve performance. Address these essentials to sustain vibrancy and avert malfunctions.
Routine protocols involve:
- Reservoir replenishment: Monitor levels weekly, refilling with room-temperature water to match evaporation rates.
- Component servicing: Clear irrigation paths monthly using a soft brush and vinegar solution against blockages.
- Plant grooming: Trim spent growth biweekly to encourage bushiness and circulation.
- Pest surveillance: Inspect undersides fortnightly, treating infestations with neem oil sprays.
- System purging: Flush lines quarterly to eliminate salt deposits from hard water.
In winter, drain outdoor reservoirs to mitigate freeze damage and cover panels if temperatures drop below 32 degrees Fahrenheit. For indoor walls, rotate units seasonally toward light sources to ensure even exposure. Consistent care extends system viability for a decade or more.
Broader Environmental and Functional Advantages
Beyond aesthetics, self-watering walls contribute to healthier surroundings. Vegetation absorbs airborne particulates and volatile compounds, purifying indoor air by up to 20 percent in enclosed spaces. Exterior installations moderate thermal fluctuations, reducing summer heat gain through evaporative cooling.
Sustainability stands out, as these systems cut water consumption by 70 percent compared to hand-watered gardens. Rainwater harvesting attachments or graywater recycling options further enhance eco-friendliness. The reusable modular framework supports relocation or repurposing, minimizing environmental footprint while maximizing utility.
Selecting an Ideal System
Tailor your choice to specific circumstances for optimal results. Evaluate these factors:
- Site specifics: Assess sun exposure, from full shade indoors to partial sun on patios.
- Botanical interests: Opt for edible herbs like basil for kitchens or ornamental evergreens for accents.
- Hydration setup: Choose hose-connected for convenience or standalone reservoirs for remote spots.
- Automation degree: Select sensor-driven models for hands-off operation or manual for budget control.
- Scale and finances: Begin with 4-by-4-foot panels under $500, scaling as confidence grows.
Measure precisely beforehand and confirm load tolerances. Renters benefit from portable, no-drill freestanding options that avoid permanent alterations.
Sustaining Your Vertical Oasis
After installation, observe as plants mature into a cohesive, evolving display. Seasonal shifts bring new blooms or color variations, rewarding patient observers. Experiment with rearrangements or introductions like seasonal annuals to refresh the composition.
Dedicate time weekly to hydration checks and minor tweaks, fostering a resilient ecosystem. Integrate supplemental LED grow lights for low-light areas or pair with automated feeders for nutrient boosts. This approach transforms blank walls into dynamic, life-affirming features that endure across years.