Decomposed Granite: The 2026 Budget Hardscape Solution
Homeowners often face yards that have lost their vitality, with worn paths and uneven surfaces diminishing outdoor enjoyment. Revitalizing these spaces can seem daunting and costly, but decomposed granite provides an effective, economical alternative. This natural material combines aesthetic appeal with practical benefits, enabling straightforward hardscape projects that restore functionality and charm.
Decomposed granite, commonly abbreviated as DG, consists of weathered granite particles that form a compact, permeable surface. Its subtle textures and warm earth tones integrate seamlessly with surrounding landscapes. Homeowners appreciate how DG supports foot traffic while allowing water infiltration, reducing runoff and erosion issues common in traditional paving.
Step One: Assess Your Yard's Needs
Begin by evaluating your outdoor area to identify usage patterns and challenges. Observe foot traffic routes, areas prone to water pooling, and sunlight exposure throughout the day. These factors influence DG placement to ensure longevity and usability.
Consider these essential questions:
- What features do you prioritize, such as walkways, seating zones, or play areas?
- Does poor drainage require elevation or grading adjustments?
- What level of ongoing upkeep fits your lifestyle?
Document your observations with photographs or simple sketches. This preparation aligns your project with actual needs, preventing costly revisions later. For instance, a DG walkway might link your front door to the backyard, enhancing accessibility without disrupting natural contours.
Step Two: Select the Right Decomposed Granite
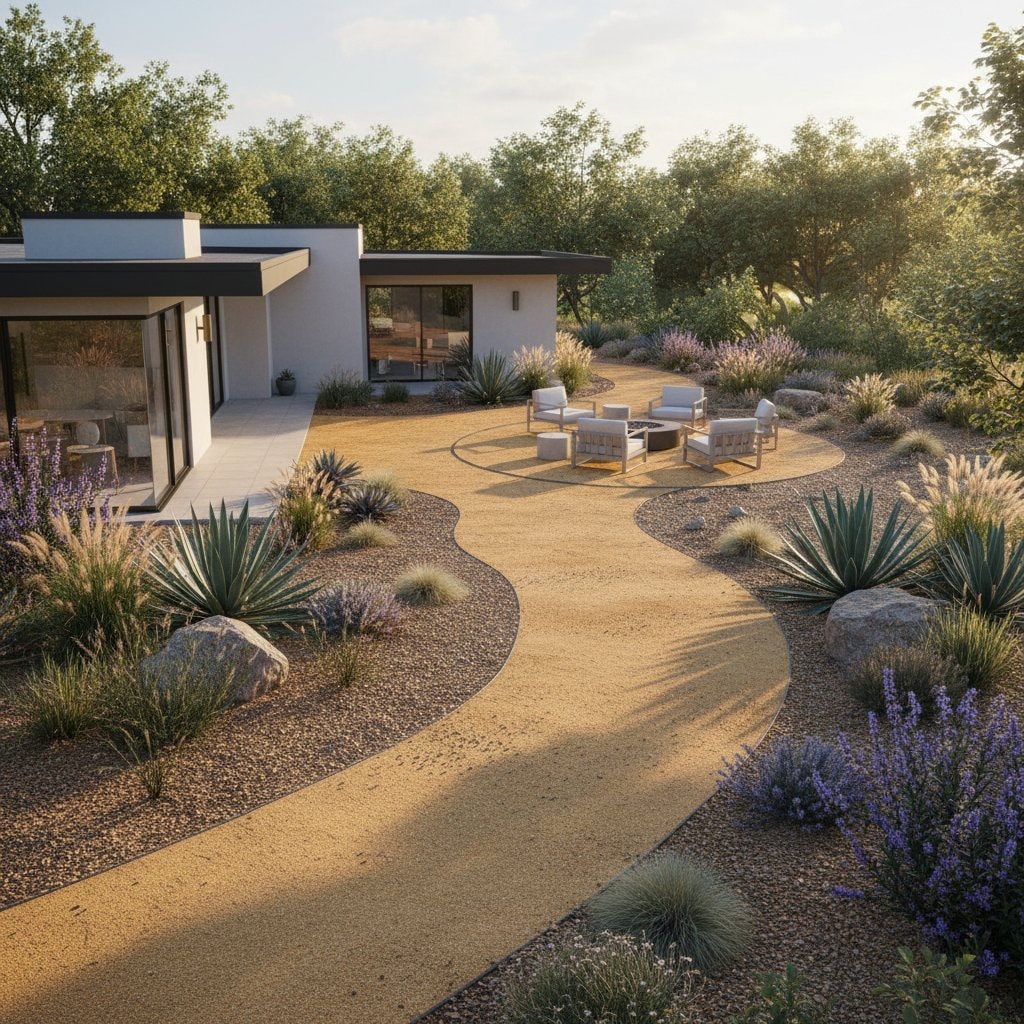
Choosing the appropriate DG type ensures compatibility with your climate and design vision. Stabilized DG includes binding agents for higher durability in high-traffic zones, while unstabilized versions suit drier, less demanding applications. Colors range from golden hues to reddish shades, allowing coordination with local soil and plants.
Evaluate these options based on your goals:
- Unstabilized DG for natural, permeable paths that blend into gardens.
- Stabilized DG for patios or driveways needing firmness against shifting.
- Resin-bound DG for a polished finish in visible areas like entryways.
Consult local suppliers for samples to test texture and color in your yard's light. Factor in particle size: finer grades compact smoothly for even surfaces, while coarser ones provide better traction on slopes. This selection step customizes your project for optimal performance and visual harmony.
Step Three: Prepare the Site Thoroughly
Proper groundwork forms the foundation for a durable DG installation. Remove vegetation, rocks, and organic matter to create a clean base. Grade the soil to achieve a 1-2% slope away from structures, promoting effective drainage.
Install these preparatory layers:
- A geotextile fabric to suppress weeds without impeding water flow.
- 4-6 inches of compacted gravel or crushed stone as sub-base for stability.
Excavate to a depth of 4-6 inches for the DG layer, depending on expected load. Use a shovel and rake for leveling, then verify with a straightedge. Thorough preparation minimizes settling and extends the surface's lifespan by up to 10 years.
Step Four: Install Decomposed Granite Layer by Layer
Apply DG in controlled increments to achieve uniform compaction. Spread 1.5-2 inches per layer using a rake for even distribution. Moisten lightly with a hose to aid settling, then compact firmly with a plate compactor or hand tamper.
Follow this sequence:
- Place the first layer and compact to half its depth.
- Add subsequent layers, repeating the wetting and compacting process.
- Edge with metal, plastic, or stone borders to contain the material.
Total depth typically reaches 3-4 inches for walkways and 6 inches for heavier use areas. Allow 24-48 hours for full curing before regular use. This methodical approach results in a stable, attractive surface resistant to erosion.
Step Five: Incorporate Budget-Saving Strategies
Decomposed granite stands out for its value, with costs ranging from $1-3 per square foot, far below concrete or stone alternatives. DIY installation further reduces expenses, requiring only basic tools like a wheelbarrow, rake, and tamper.
Implement these cost-effective practices:
- Source DG from nearby quarries to avoid high transportation fees and select regionally appropriate colors.
- Repurpose existing materials, such as leftover pavers, for edging to minimize new purchases.
- Integrate DG with drought-tolerant plants or mulch to cover larger areas affordably.
- Phase the project: complete a single pathway first, then add features over time.
These tactics keep projects under budget while delivering professional results. Focus on scalable elements that evolve with your needs, ensuring long-term satisfaction.
Maintain Your Decomposed Granite Surfaces
Established DG surfaces require minimal effort to retain their appeal. Regularly sweep debris to prevent buildup, and rinse with a hose to remove stains from pollen or dirt. Reapply a thin top-dressing of DG annually in high-wear spots to address any erosion.
Address common issues promptly:
- Re-compact loose areas after heavy rain using a tamper.
- Inspect borders seasonally and adjust as needed to contain fines.
- Avoid harsh chemicals; use mild soap for cleaning.
With consistent care, DG withstands weather variations and foot traffic, maintaining its natural patina. This low-demand routine frees time for enjoying your revitalized yard rather than laboring over it.
Achieve Lasting Outdoor Renewal
Decomposed granite empowers homeowners to create functional, inviting landscapes without excessive investment. From guiding daily paths to anchoring gathering spots, it fosters a connection to nature through its organic presence. As your yard adapts to this versatile material, expect increased usability and enduring style that complements 2026's sustainable trends.