Understanding Dark Sky Lighting and Its Impact
Many people step outside at night expecting a serene view of stars twinkling above their gardens, only to encounter a hazy glow from excessive artificial light. This light pollution not only obscures the celestial beauty but also disrupts the natural tranquility of outdoor areas. Dark sky lighting addresses these issues by promoting fixtures and practices that direct illumination precisely where needed, fostering safer, more inviting spaces while protecting the environment.
The concept of dark sky lighting originates from efforts to combat light pollution, a growing concern in urban and suburban areas. Organizations like the International Dark-Sky Association advocate for standards that minimize upward light spill, which contributes to skyglow and harms wildlife. By adopting these principles, homeowners can enhance their properties' aesthetics and functionality without compromising the night's inherent charm.
Benefits extend beyond visibility. Properly implemented dark sky lighting reduces energy consumption by up to 50 percent compared to traditional setups, as light focuses efficiently on paths and features rather than scattering wastefully. It also supports biodiversity by preserving natural darkness essential for nocturnal animals, creating a more balanced ecosystem in your backyard.
Step 1: Evaluate Your Current Lighting Setup
Begin by conducting a thorough nighttime assessment of your property. Walk the perimeter after sunset and observe how existing lights interact with the space. Identify areas where glare creates shadows or blinds viewers, making navigation difficult.
Pay attention to light trespass, where illumination spills onto neighboring properties or upward into the sky. Use a simple tool like a flashlight to mimic fixture output and check for bulb visibility from various angles. Document findings in a notebook, noting fixture locations, types, and any discomfort caused by uneven brightness.
This evaluation reveals inefficiencies, such as unshielded bulbs that contribute to pollution or overly bright LEDs that overwhelm subtle landscape elements. Understanding these patterns forms the foundation for targeted improvements, ensuring your revisions align with both practical needs and dark sky goals.
Step 2: Select Appropriate Fixtures and Bulbs
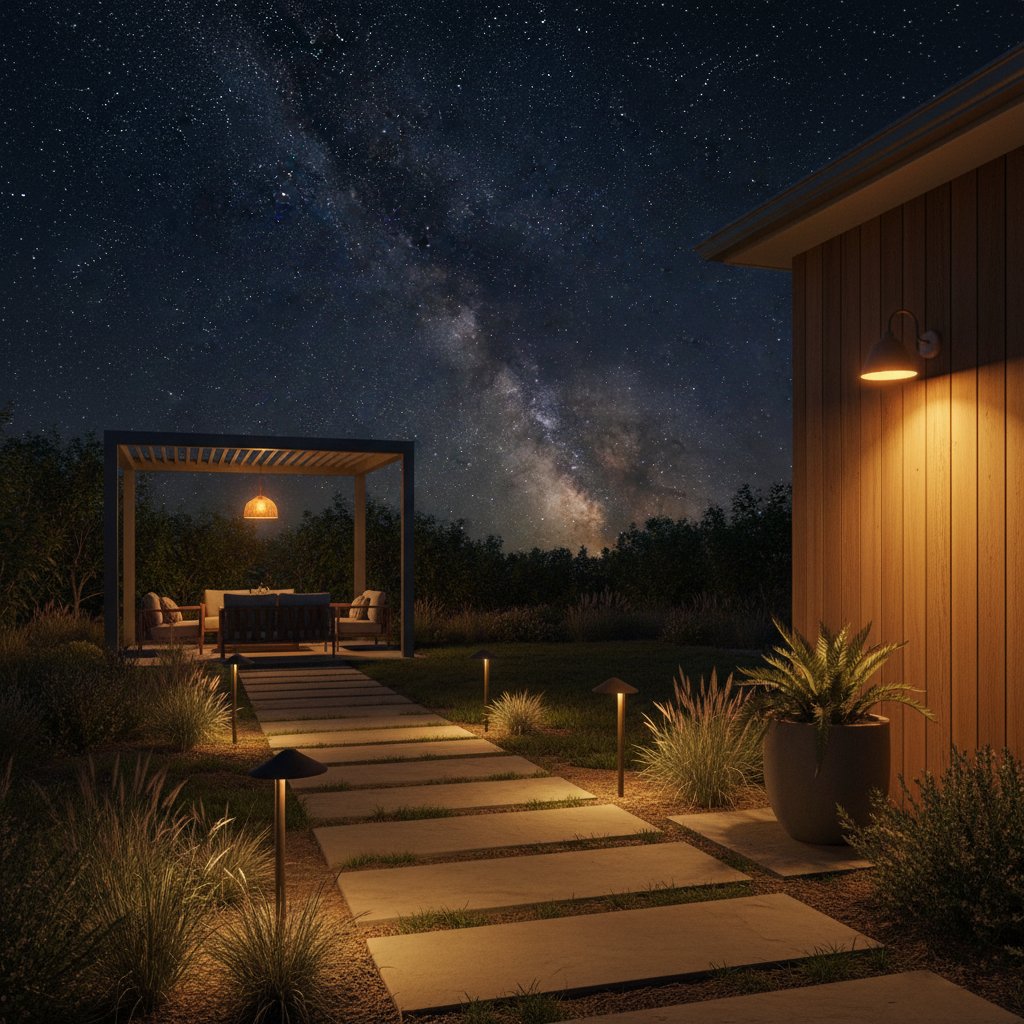
Once you identify problem areas, focus on sourcing dark sky compliant products. Seek fixtures certified by dark sky programs, featuring full cut-off designs that prevent light from escaping above the horizontal plane. These shields ensure 90 percent or more of the output directs downward, preserving starry views.
Opt for bulbs with warm color temperatures between 2200K and 3000K, which mimic the soft glow of firelight or sunset. Avoid cool temperatures above 4000K, as they produce a stark, bluish light that exacerbates glare and interferes with sleep patterns. LED options in these ranges offer longevity, often lasting 25,000 hours or more, while consuming minimal power.
Material quality matters for longevity. Choose corrosion-resistant options like bronze or stainless steel for coastal areas, or UV-stabilized plastics for milder climates. Invest in adjustable models that allow fine-tuning of beam angles, enabling customization for pathways, patios, or accent lighting on trees and sculptures.
Step 3: Plan and Implement Strategic Placement
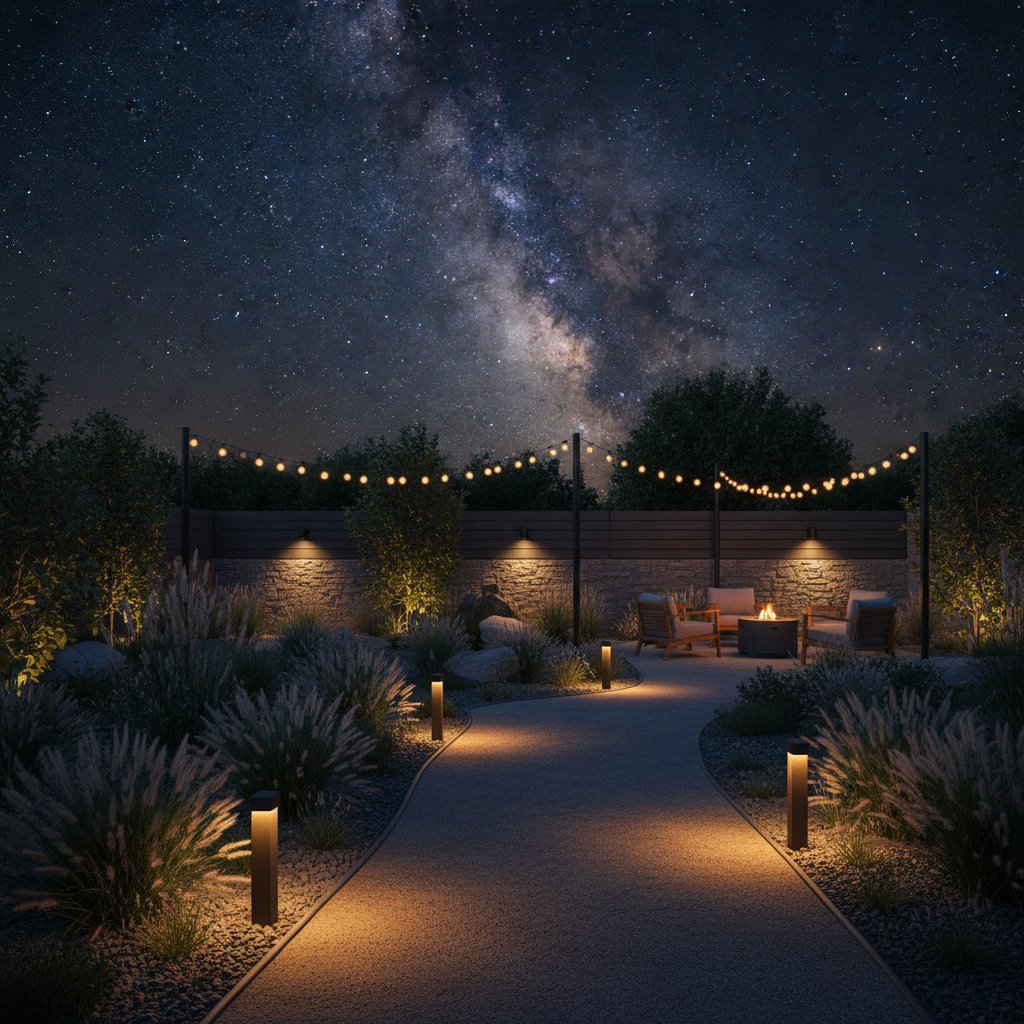
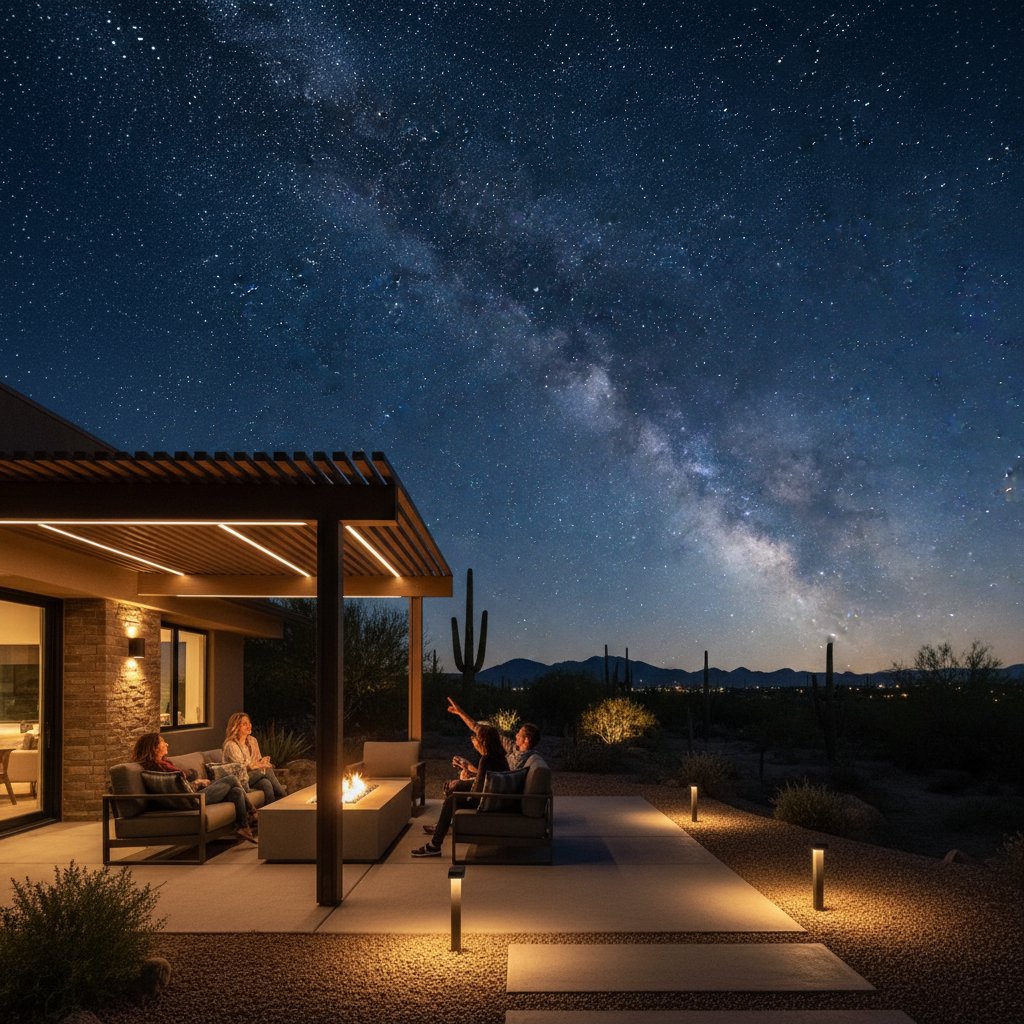
Effective dark sky lighting requires thoughtful positioning to illuminate without overwhelming. Map out your space, prioritizing high-traffic zones like walkways and entrances for safety-focused illumination. Space fixtures 8 to 12 feet apart to create even coverage without hot spots.
Incorporate layering by combining path lights at 18 inches high with bollards or spotlights for focal points. Angle all fixtures downward at a 10 to 15 degree tilt to contain light within the intended area. For larger properties, consider zoning with motion sensors that activate only when needed, further reducing pollution.
Test installations during setup by viewing from multiple perspectives, including from indoors and neighboring views. Adjust heights and directions iteratively until light pools gently on surfaces without upward leakage. This step ensures your design enhances security while maintaining the dark sky's integrity.
Step 4: Integrate Controls for Efficiency
To maximize dark sky benefits, incorporate smart controls that automate operation. Install timers or photocells to activate lights at dusk and deactivate at a set time, typically midnight, allowing natural darkness to prevail during peak stargazing hours. Dimmable systems enable gradual intensity reduction as the evening progresses.
Motion detectors add convenience for security without constant illumination. Place them strategically to cover entry points, triggering low-level lights that fade after movement ceases. These features not only conserve energy but also adapt to usage patterns, such as brighter settings for gatherings and subdued modes for quiet reflection.
Regular calibration prevents overuse. Review control settings seasonally, adjusting for longer summer nights or holiday displays. Such integration transforms lighting from a static element into a dynamic system that supports both daily life and environmental stewardship.
Step 5: Perform Ongoing Maintenance and Adjustments
Dark sky lighting demands periodic attention to sustain performance. Inspect fixtures quarterly for dust accumulation, which can diffuse light unpredictably, or lens cracks that allow stray beams. Clean with a soft cloth and mild soap, avoiding abrasive materials that scratch surfaces.
Monitor bulb degradation, as output dims over time, potentially requiring brighter replacements to compensate. Trim encroaching vegetation that alters light paths, ensuring paths remain well-lit without casting unintended shadows. Document changes to track long-term effectiveness.
As your landscape evolves, revisit the plan annually. A maturing shrubbery might need repositioned accents, or new additions like a water feature could benefit from subtle uplighting alternatives. This proactive approach keeps your setup aligned with dark sky principles and your shifting aesthetic preferences.
Observing the Transformation in Your Garden
After implementing dark sky lighting, subtle enhancements emerge over time. Plant foliage takes on deeper, more vibrant hues under controlled warmth, while pathways feel secure yet unobtrusive. The absence of glare invites longer evenings outdoors, fostering relaxation amid natural sounds.
Stargazing becomes a rediscovered pleasure, with constellations emerging clearer than before. Seasonal shifts reveal new interactions, such as how full moons illuminate dew-kissed leaves when artificial light recedes. These observations deepen appreciation for your garden as a living, breathing extension of the night.
Energy bills reflect the efficiency, often dropping noticeably with targeted use. Wildlife activity increases, with birds and insects thriving in reduced disruption. This holistic improvement underscores dark sky lighting's role in creating sustainable, soul-nourishing outdoor havens.
Implementing Changes for Lasting Harmony
Start your journey with manageable updates, such as retrofitting a single entry light with a shielded cover. Gradually expand to full pathways, consulting local guidelines for compliance if in a dark sky community. Track progress through before-and-after photos to visualize impact.
These efforts extend beyond aesthetics, contributing to broader conservation. Your choices inspire neighbors, potentially sparking community-wide adoption. In this way, dark sky lighting cultivates not just a beautiful yard, but a mindful connection to the cosmos overhead.